Monthly Archives: July 2013

Spotify?!

I am really not exactly sure how it could happen, that I haven’t signed up to Spotify earlier. For 10 € per month they let me stream almost 90% of all the music I’ve ever wanted to hear + I can store music on my mobile for offline use for 30 days. – All of this in 320kbps vorbis quality (= very good)

Spotify

This almost sounds too good to be true: I am aware that there might be problems such as bad compensation for musicians, the possibility that the service might stop some day and that there will be nothing tangible that I will be left with when that moment comes, but the great time I’ve had listening to awesome music.

We are all left to wonder what the future of the music business will bring. Still I believe that this kind of service is the future some way or other.

How do you access your music? CDs from your local store, CDs via amazon or ebay, an online service such as Spotify, sharing with friends, FM or internet radio or – heaven forbid – illegal downloads?

Whatever it is: the most important thing is to not forget to go to concerts and listen to whatever music gets you in the mood: LIVE!

A Personal WWW Story

From time to time I just can’t resist: My website / blog (whatever it is) has to change. The time has come again and the result is what you are looking at right now. This recent facelift triggered me to dig through my personal archives and old back-ups to take a look at the long way my website(s) has / have come. And truly a long way it is.

1999 – My First Lines of HTML

I found out that I wrote my first couple of HTML and JavaScript lines in 1999, a time when everybody was still using Netscape Navigator to browse the web and Altavista to google – obviously nobody called it “to google” at the time. I had no idea how to use computer graphics software, but paintbrush and my 56k modem – yep one of those that made the funny noises – was all I needed to upload my first piece of HTML art.

1999

Well, lots of typos and not exactly art. Fun fact: I used Labview to generate the buttons. By the way this is the only thing that I’ve ever found Labview to be useful for.

2000 – Flash and HTML

The next thing I discovered was a soon-to-be-dead technology known as Flash, which I used to create Version 2.0 of my personal website in 2000.

2000.1

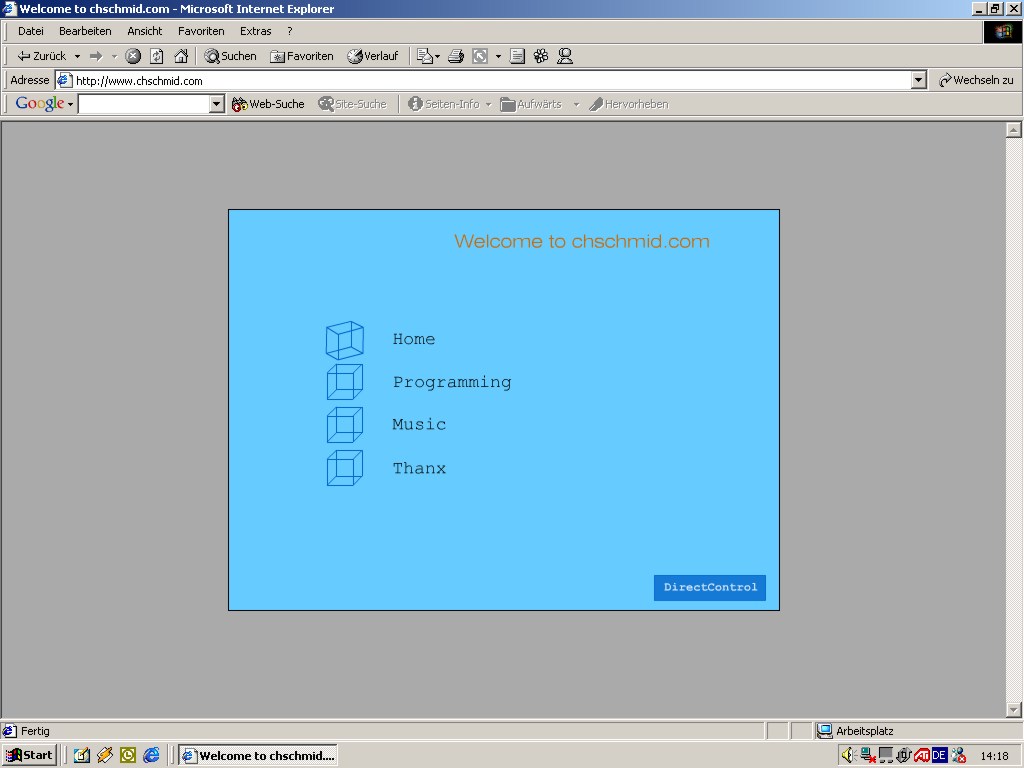
Please note the cubes, which would stick with me for a couple of years. I did also get my own domain www.chschmid.com around that time. It was a free offer, all you had to accept was ads on your website, which I of course was able to hide via JavaScript. As not every computer supported Flash I also continued with HTML in parallel. The interesting aspect about HTML based websites is that you can always look at the source code. So what I did is I just copy-and-pasted an interesting design that I had found online and modified it to my needs. Yes this is stealing, but I just did not care at the time.

2000.2

Until the time came that I did care and so I designed a new website in 2001.
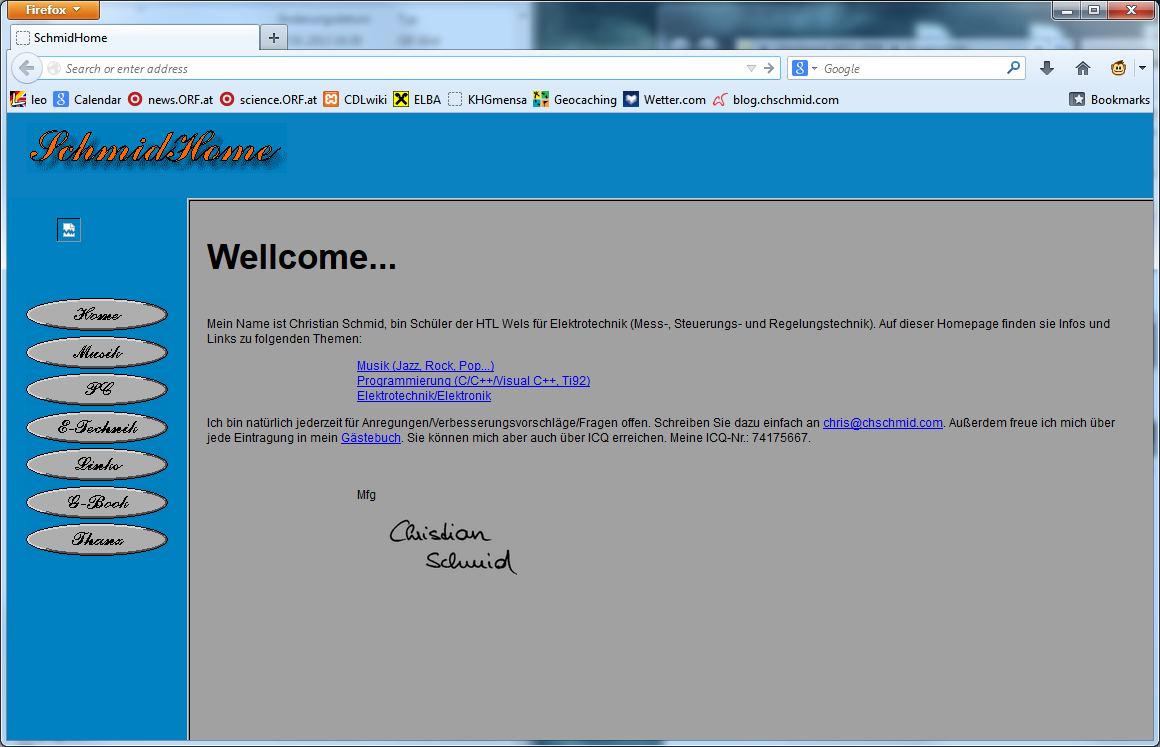
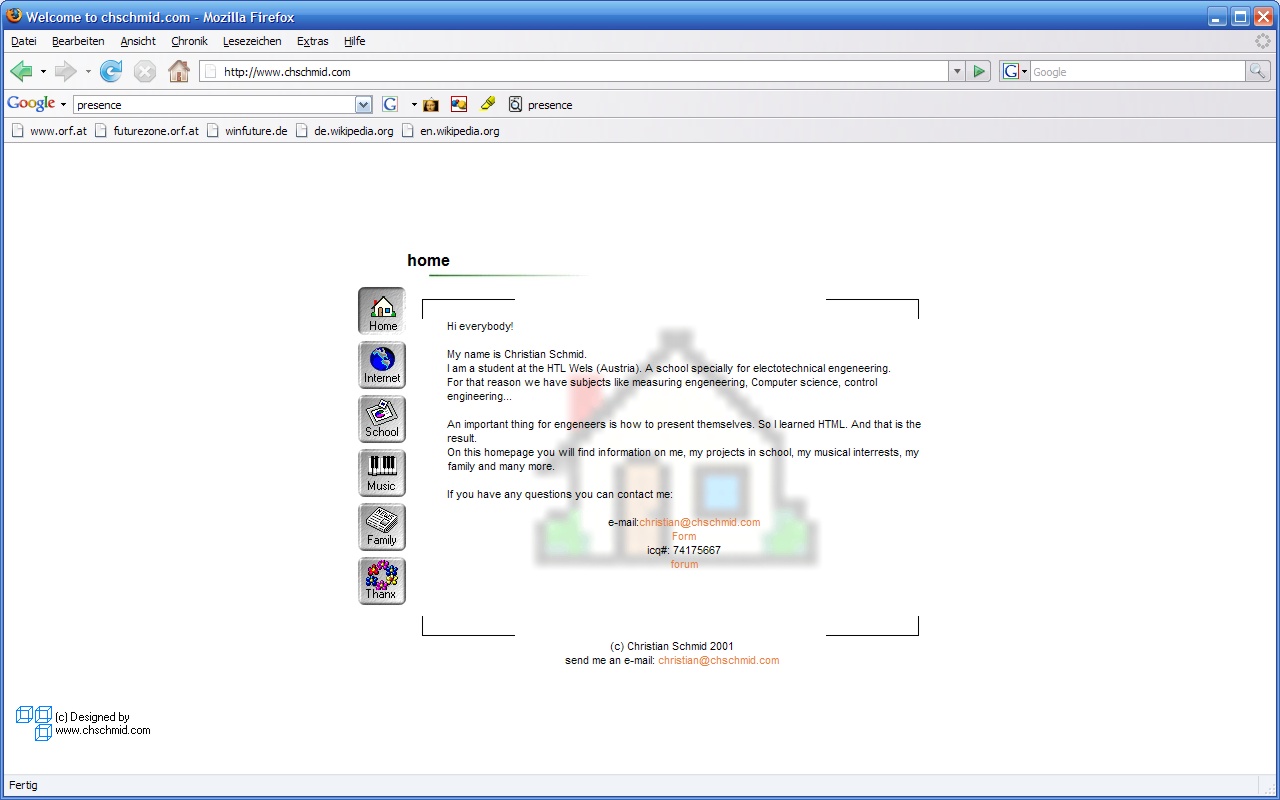
2001 – HTML Design

This actually was the first time that I did really design something in HTML. I had learned how to use the Corel Graphics Suite by then and the design was centered around icons and styles that remind me very much of the icon design language of the 90s.

2001.1

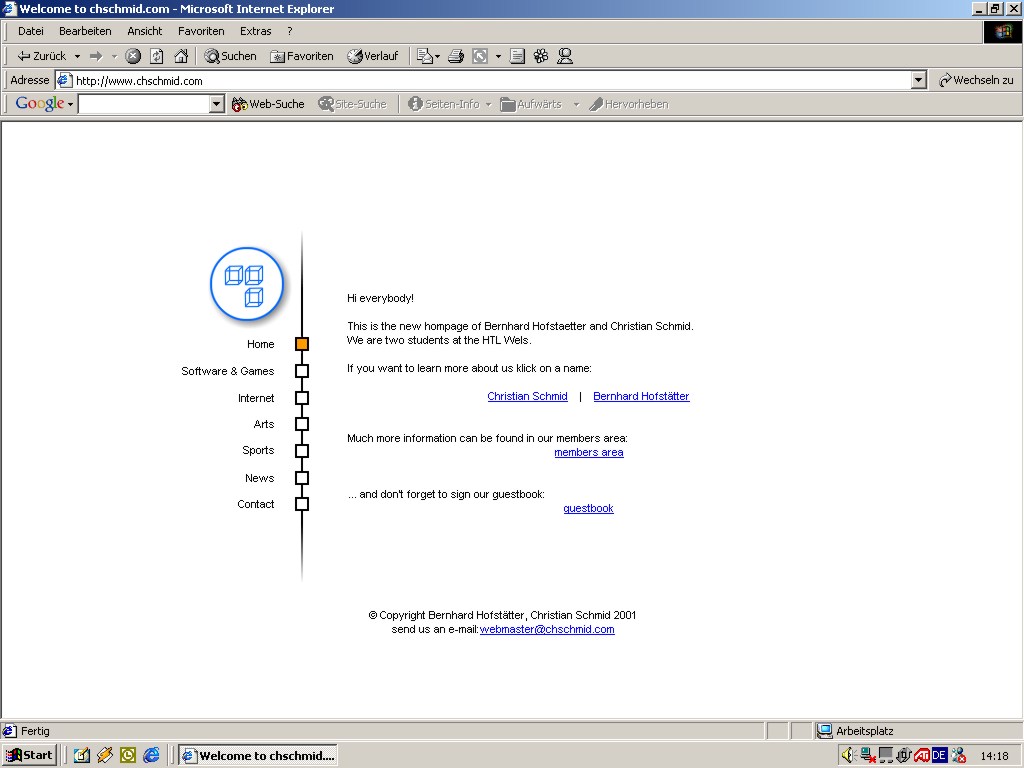
In the same year I did try to set up a website as joint project with a very good friend of mine. He’s doing a lot of photography these days.

2001: A joint project

2001/2002 – The Rise of PHP

In 2001/2002 I started using PHP and MySQL as server-side technologies to enhance my website. All of my PHP scripts were home-grown and for applications such as guestbooks and calendars. At the same time I also started to work for Fronius as web developer. Looking back it is funny to see how little I knew, and how much that was worth at a time, when it was common knowledge that the Internet is THE big thing yet virtually none of the 35+ knew much about the technologies behind it. So here’s my design from 2001/2002.

2002

There are some note-worthy aspects about this screenshot. First it shows that I ran Windows XP, second I was using IE (Ah!!!), third and most importantly: From the URL and the taskbar one can see that I had Apache running on my local machine for developing PHP scripts.

2002-2006 – PHP Nuke

In 2002 I found out that there were online communities that developed PHP Content Management Systems. Looking back I made a very bad choice and started using php-nuke. I did also code some modules for the system.

2006

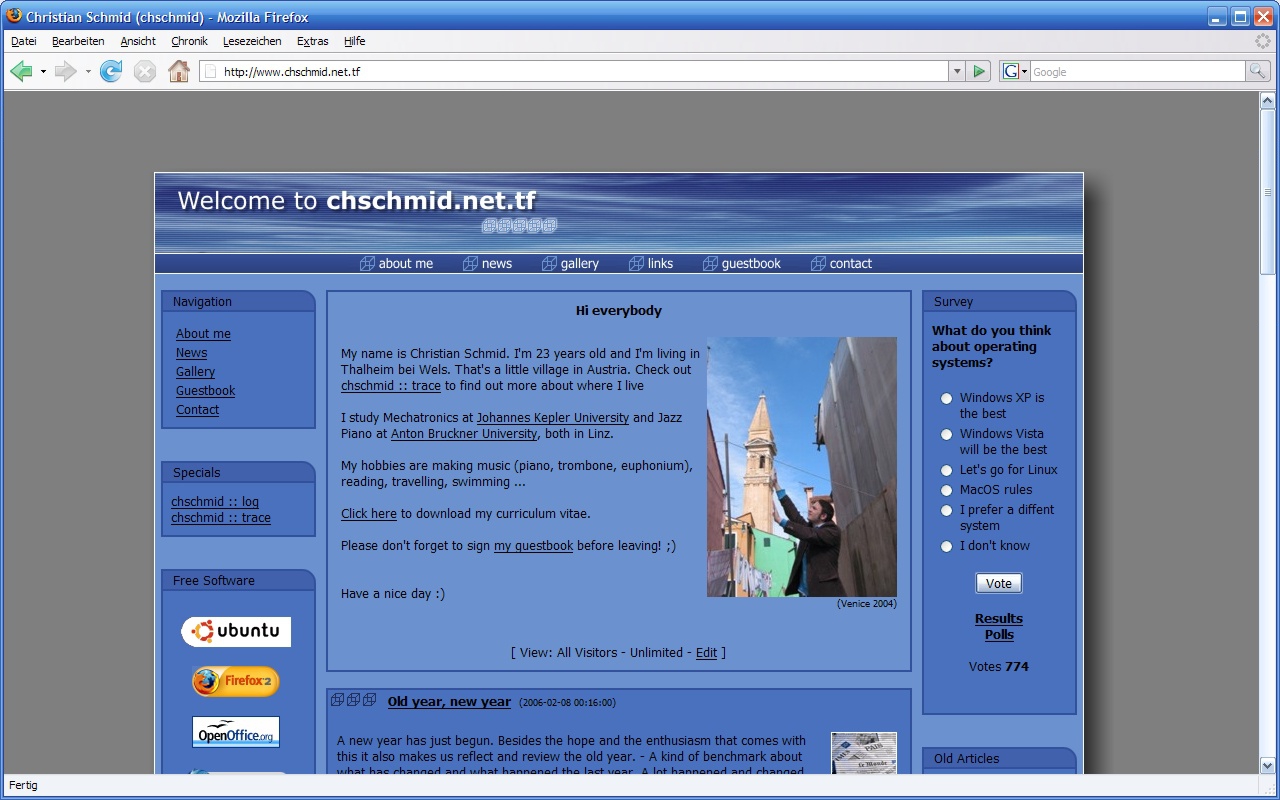
I think some time in 2003 the free domain offer expired, and I began using www.chschmid.net.tf instead of www.chschmid.com. From then on I was also forced to be aware of CSS, which I had tried to avoid whenever possible. Interestingly this had worked quite well for a long time! In 2006 I did a minor facelift to account for the facts that screen resolutions were getting higher and that font rendering and anti-aliasing technologies had advanced. At the same time php-nuke had some serious security vulnerabilities and I found that the framework was more than I actually needed.

2006-2008 – HTML + PHP

So I did another redesign, again with almost static HTML and some home-brewed PHP + I did improve the design to be more photo-centric in 2007.

2007-2009

I didn’t change content regularly but uploaded all my music gigs.
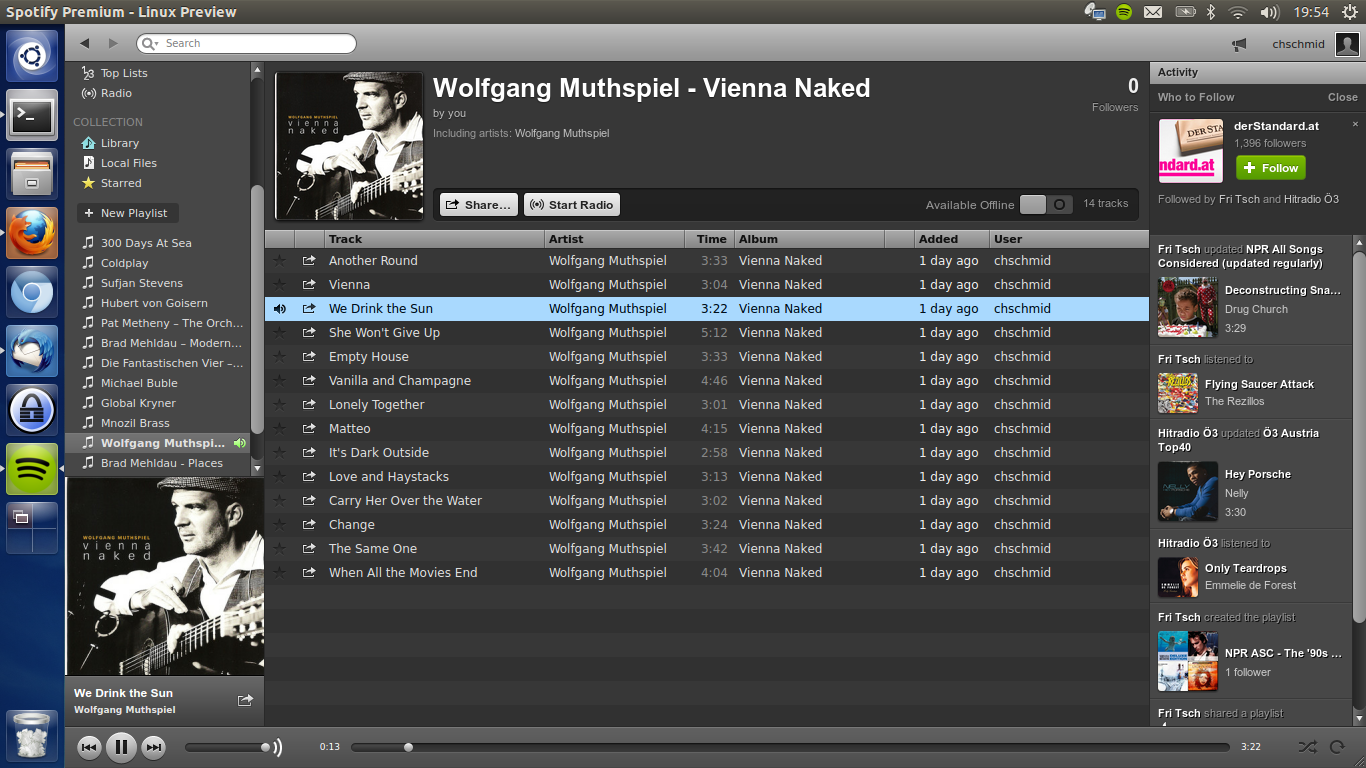
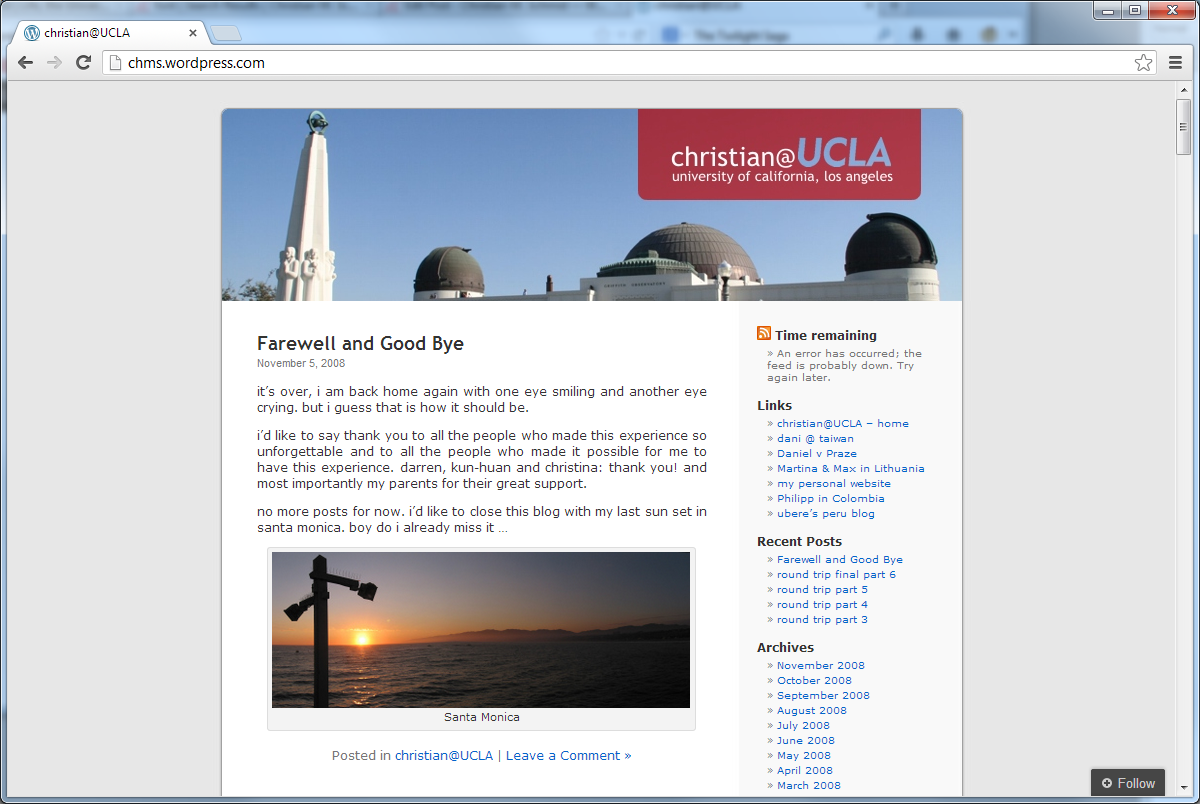
2008+ – WordPress

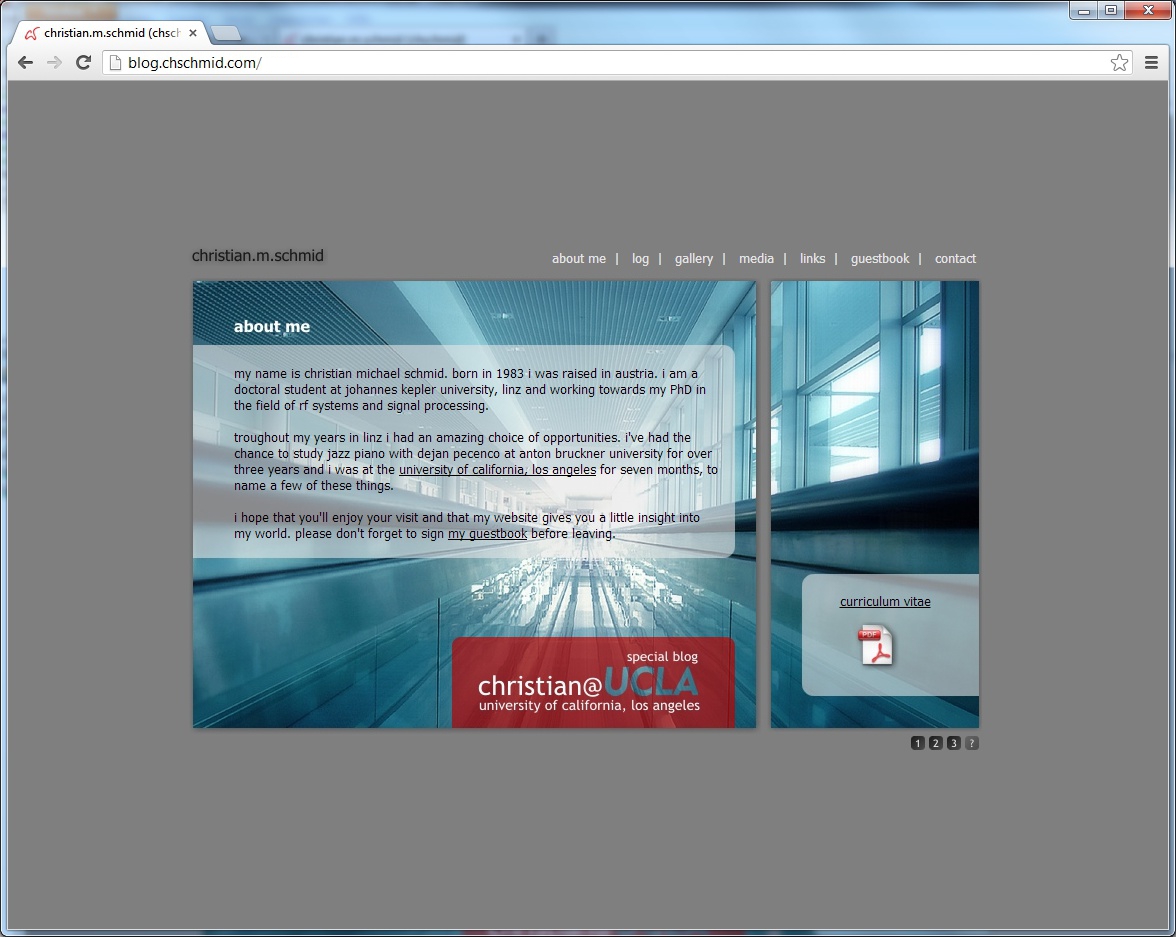
When I went to UCLA in 2008 I needed a more flexible system for pushing information online regularly. With lots of exams and the bureaucracy of going to the US at hand I didn’t have too much time to set up the whole thing, so I went with a blog hosted at wordpress.com and minor default template modifications: chms.wordpress.com.

2008

I did get back “my domain” in 2009 and set up a self-hosted wordpress blog in 2010. I again used a pre-defined wordpress template with some individual modifications. Actually I did come to the decision that I wanted a new blog while on a plane from Hawaii to LA and set the whole thing up during my first night in LA. – You gotta fight jet lag somehow, right. In 2012 I did read and play around a lot with fonts, and so some font changes became inevitable.

2010-2012

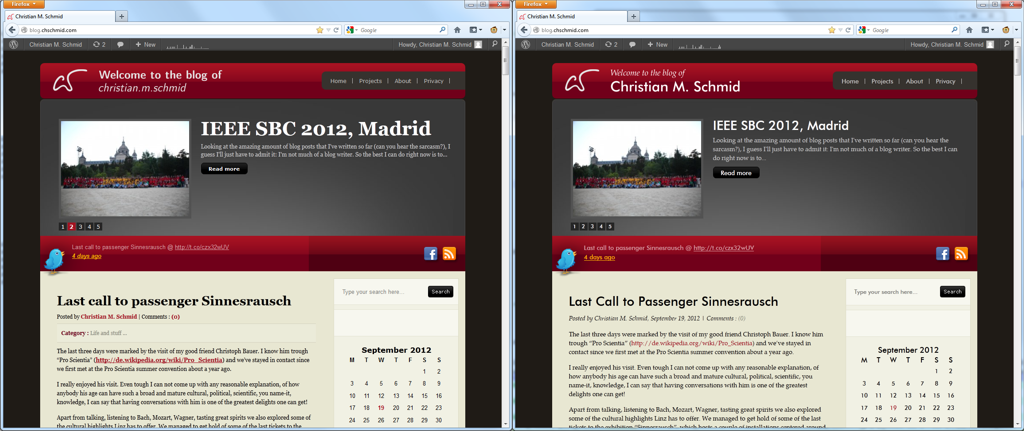
What is interesting to see in all screenshots from 2006-2013 is that fonts have become more important, more beautiful and that there were a lot of pseudo-realistic design elements: Textures, shadows, lots of boxes – something that more and more designers are avoiding these days, e.g., if you think about the iOS 7 resign, or the bold and beautiful move that Microsoft has made with Windows Phone 7 and Windows 8 a few years back.

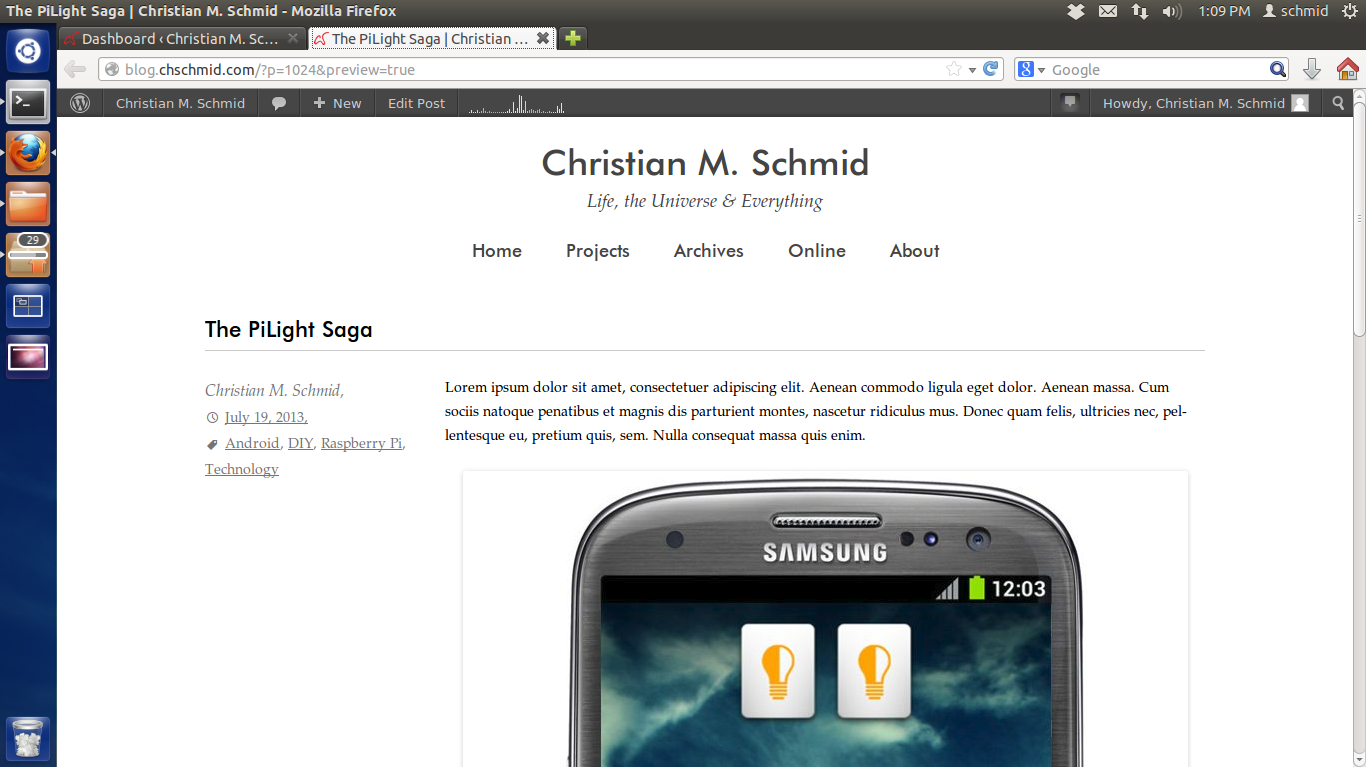
2013 – The Time is Now

This brings me to what you have in front of you today: A novel, minimalistic, content-centered approach. It’s a new theme for the same self-hosted wordpress system, that I have been using since 2010 (with all the latest updates of course)

2013

And so here come the most important questions: What do you think about it? What would you change? And maybe: What’s your personal Web story?
PS. My template can of course be downloaded from my github site.

Raspberry PI + Raspbian + Squeezeslave

I am not going to waste too many words this time, instead I am just posting the commands required to get squeezeslave run as deamon on a Raspbian Raspberry Pi.

  1. Download and untar latest Squeezslave for your Raspberry from https://code.google.com/p/squeezeslave/. As of today this can be done via
    wget https://squeezeslave.googlecode.com/files/squeezeslave-1.3-390-armhf-lnx32.tar.gz
    tar -zxvf squeezeslave-1.3-390-armhf-lnx32.tar.gz
    
  2. Move everything into the right places
    sudo mkdir /usr/local/squeezeslave
    sudo mv squeezeslave /usr/local/squeezeslave
    sudo chown root:root /usr/local/squeezeslave/squeezeslave
    sudo ln -s /usr/local/squeezeslave/squeezeslave /usr/local/bin/squeezeslave
    

    From here on you should already be able to run squeezeslave via

    squeezeslave -o 0 YOURSERVER
  3. To run squeezeslave as a deamon and at the system start you’ll need to add this file and get it to the right place.
    wget https://blog.chschmid.com/media/squeezeslave
    sudo mv squeezeslave /etc/init.d
    sudo chown root:root /etc/init.d/squeezeslave
    sudo chmod 755 /etc/init.d/squeezeslave
    sudo update-rc.d squeezeslave defaults
    
  4. Now all that is left is to create a config file
    sudo joe /etc/default/squeezeslave
    

    with the following content:

    SSMAC="xx:xx:xx:xx:xx:xx"
    SBSHOST= YOURSERVER
    SSOPTIONS="-o 0"
    

    Obviously you want to configure it to work with your server and add the MAC address which you find under HWaddr using

    ifconfig
    
  5. You can now either reboot your machine or start the service manually
    sudo service squeezeslave start
    

Another problem is that the Raspbian by default boots at a rather low audio volume. This can be fixed by

  1. setting the volume with the command line mixer
    sudo apt-get install alsa-utils
    alsamixer
    
  2. and storing the settings
    sudo alsactl store
    

The Life of My New Pi

Sorry to disappoint some of you: This is not about the great movie that I watched on an airplane on my way to Seattle just recently. This post is about my newest gadget. I just could not resist getting myself a Raspberry Pi, which is a low power (low power as in low electrical power but also as in low computational power) credit-card-sized single-board ARM computer. Meet my new toy:

wpid-20130707_184802.jpg

I did also buy

  • a transparent case,
  • an 8GB SD card,
  • and a micro USB charger as power supply.

If you order all of this stuff online you should be able to get it for around 50-60 €. – When it comes to the Raspberry Pi (RPi) low power also means inexpensive.

What I did not expect: I had it up and running in about 10-15 minutes. Raspbian was the obvious choice for me as Ubuntu user. After

  1. downloading the Raspbian image from http://www.raspberrypi.org/downloads
  2. extracting it via the terminal
    unzip 2013-05-25-wheezy-raspbian.zip
  3. copying it to the SD card via the terminal
    sudo dd bs=4M if=2013-05-25-wheezy-raspbian.img of=/dev/mmcblk0 && sudo sync
  4. plugging the SD card into the RPi and connecting the power supply / monitor / keyboard,

I could configure the RPi using the built in Raspbian tool. Again, 10-15 minutes + maybe 10 extra minutes for the first time configuration, absolutely hassle-free, and you’ll be greeted by the familiar Linux login. – I was impressed.

Now the obvious question that most people are likely to ask is: “What are you going to do with it” and I am guilty as charged. More often than not I do buy those gadgets without even knowing what I would need or use them for, just for the fun of playing around with them. With the RPi it’s quite similar tough I have two applications in mind, with one of them up and running already:

  1. RPi as music streaming device
  2. RPi as “bedroom light server”

2. will be a more elaborate project, which I am going to talk about some other day, 1. is more obvious. The thing is I am running a home server (Ubuntu 12.04 on some low power AMD E-350 hardware) which (amongst others) acts as Logitech Media Server for a Logitech Squeezbox Radio and a Logitech Squeezebox Touch. I do really love both devices and the whole Squeezebox concept. It lets you stream music from a local server as well as from Internet radio stations, synchronize multiple players, control everything via PCs / smartphones / tablets and much more.

Both pieces of hardware that I did get from Logitech were not cheap, but are worth every penny (or Euro cent in my case). Moreover all software, both the server and the client side, is cross-platform and open-source. This is probably mainly due to the fact that Squeezebox was not invented by Logitech but by Slimdevices which was later acquired by Logitech. Anyway, Logitech managed to ruin one of the most promising competitors in the audio streaming market and in 2012 announced that they would discontinue the Squeezebox line in favor of a new, over-priced and crappy product line with less features. No worries, I will stop complaining about Logitech’s completely crackbrained decision, because there is a solution: The RPi can stand in as perfect Squeezebox streaming device replacement!

In a later post I am going to explain how to configure the whole thing to run when the RPi starts up. For now (again from a terminal) it is just as easy as

  • wget https://squeezeslave.googlecode.com/files/squeezeslave-1.3-390-armhf-lnx32.tar.gz
  • tar -zxvf squeezeslave-1.3-390-armhf-lnx32.tar.gz
  • ./squeezeslave -o 0 -M “test.log” 192.168.1.200

That’s all that is needed to turn your RPi into a Squeezebox client in under 30 minutes and the beginning of the life of my new Raspberry Pi …