Thank you all for dropping by in 2013! For those who care, here are the blog stats that wordpress sent me for 2013: http://jetpack.me/annual-report/16165614/2013/
I wish you and your loved ones all the best for 2014 and enjoy today’s party!
Thank you all for dropping by in 2013! For those who care, here are the blog stats that wordpress sent me for 2013: http://jetpack.me/annual-report/16165614/2013/
I wish you and your loved ones all the best for 2014 and enjoy today’s party!
The Logitech K810 is a nice keyboard, but it does not work with Ubuntu out of the box. Still contrary to what some websites might lead you to believe, it does work. The following instructions worked for me on Ubuntu 13.10 & 14.04.
sudo apt-get install bluez-hcidump bluez-utils blueman
hcitool scan
if the K810 is found this should give you something like
Scanning ...
       xx:xx:xx:xx:xx:xx   Logitech K810
sudo hcidump -at | grep pass
sudo bluez-simple-agent hci0 xx:xx:xx:xx:xx:xx
By default, the function keys (the ones above the numbers row) are assigned to special functions like media control, which I find annoying. – Every time you want to do something normal like Alt-F4 or search via F3 you need the Fn key. Logitech’s windows software on the other hand lets you invert the Fn key. Actually all the Windows software does is to send a certain string of commands to the keyboard, which some clever Linux Guru has reverse engineered and coded into a nice little program, that can be found at http://www.trial-n-error.de/posts/2012/12/31/logitech-k810-keyboard-configurator/. I’ll again add a step-by-step guide:
sudo apt-get install build-essential
wget https://blog.chschmid.com/media/k810_conf-v0.1.tar.bz2
tar -jxf k810_conf-v0.1.tar.bz2
./build.sh
sudo ./k810_conf -d /dev/hidraw<x> -f on
You will have to replace <x> by the hid number that was assigned to your keyboard. In my case it is hidraw2. Of course there are more clever ways, but just work through the numbers brute force starting with hidraw0. – Mario’s program is clever enough to detect if it’s not the K810.
Apart from some minor owncloud glitches me.chschmid.com is running pretty smoothly right now. It’s doing a great job, both as my server and my Desktop replacement. But I can’t guarantee that it will stay that way. Neither can I expect the hard disk drives (HDD) to last forever nor can I guarantee that some idiots won’t burn down the apartment building by setting their Christmas tree on fire. (Don’t laugh, it has happened to my sister)
 Used under CC BY-SA 3.0, originally by Diether
So a backup strategy is in inevitable. Now for the first scenario (a dying HDD) people have come up with a solution known as RAID. However that is not what I am doing. For simplicity, I just copy most of my important stuff from one HDD to another once a day. – Actually the server does this automatically via a cron job file /etc/cron.d/cSBackupLocal
12 4 * * * root /usr/local/bin/cSBackupLocal.sh;
which executes a simple rsync script /usr/local/bin/cSBackupLocal.sh that does
# Backup data from first hard drive (me1) to second hard drive (me2)

# GIT - My life and stuff
rsync -a --delete /media/me1/git/   /media/me2/Backup/git

# Music - My other life support
rsync -a --delete /media/me1/Music/ /media/me2/Backup/Music

# owncloud
rsync -a --delete /media/me1/ocdata/ /media/me2/Backup/ocdata
The second scenario (house burning down) can not be dealt with that easily. E.g., with the two HDDs that do the mirroring once a day at the same location, a fire would destroy both. So you have to have a copy at some other place.
My most important things (about 20 megs) I have in an encrypted archive that is synced to Dropbox. Things like my Keepass file and Scans of important documents. – You are right, they might give that file to the NSA or something, but as it is encrypted they’ll chew on it for a while.
The only viable solution for my more extended remote backup is to have an external hard drive, that I bring for doing a backup every now and then. When it is not plugged into my server for backup it is stored away safely somewhere else. – As in not within a 5 km range of my apartment. Obviously this system has flaws, like if there is a fire the day I do the external backup, I am still screwed. – But I guess that is as safe as it gets.
Ubuntu comes with almost everything that you can think of out of the box. And almost all of those little exceptions can be found elsewhere. So here’s how to install a couple of those things that I just would not want to miss ;)
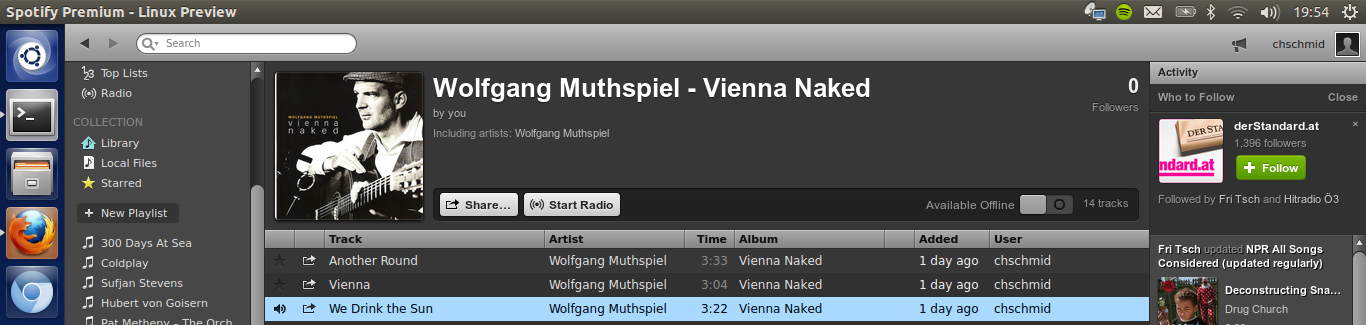
sudo add-apt-repository "deb http://repository.spotify.com stable non-free"
sudo apt-key adv --keyserver keyserver.ubuntu.com --recv-keys 94558F59
sudo apt-get update
sudo apt-get install spotify-client
I have written an app to keep track of my todos, lets install it!
sudo add-apt-repository ppa:chms/jdotxt
sudo apt-get update
sudo apt-get install jdotxt
Can be installed as described at http://software.opensuse.org/download/package?project=isv:ownCloud:devel&package=owncloud-client
sudo echo 'deb http://download.opensuse.org/repositories/isv:ownCloud:devel/xUbuntu_13.10/ /' >> /etc/apt/sources.list.d/owncloud-client.list
sudo apt-get update
sudo apt-get install owncloud-client
So far the server was in a protected environment, but it’s time to let it see the world! This involves three things:
You only want those ports to be open that you really need. I’d recommend using ufw for configuring your firewall. In my case
sudo ufw allow ssh
sudo ufw allow http
sudo ufw allow https
sudo ufw deny proto udp to any port 137 from 192.168.22.1
sudo ufw deny proto udp to any port 138 from 192.168.22.1
sudo ufw deny proto tcp to any port 139 from 192.168.22.1
sudo ufw deny proto tcp to any port 445 from 192.168.22.1
sudo ufw deny proto tcp to any port 9000 from 192.168.22.1
sudo ufw deny proto tcp to any port 5901 from 192.168.22.1
sudo ufw deny to any port 3483 from 192.168.22.1
sudo ufw allow proto udp to any port 137 from 192.168.22.0/24
sudo ufw allow proto udp to any port 138 from 192.168.22.0/24
sudo ufw allow proto tcp to any port 139 from 192.168.22.0/24
sudo ufw allow proto tcp to any port 445 from 192.168.22.0/24
sudo ufw allow proto tcp to any port 9000 from 192.168.22.0/24
sudo ufw allow proto tcp to any port 5901 from 192.168.22.0/24
sudo ufw allow to any port 3483 from 192.168.22.0/24
which means allowing access to SSH, HTTP and HTTPS from anywhere in the world and to the squeezebox server and the Samba server only from the local network but not from the router. Finally you need to enable the firewall:
sudo ufw enable
My provider gives my router a new IP (= unique address on the web) from time to time. To be able to find my router/computer from the outside world, I have to report my IP to someone who can help me find it any time.
Here is how it works: me.chschmid.com points to chschmid.mooo.com and chschmid.mooo.com I have tell what my current IP is when it has changed. It’s less complicated than it sounds
By the way if your router is running on a modified firmware such as DD-WRT, this task can also be handled by your router and configured via its web interface. Just search for Dynamic Domain Name Service (DDNS). Sadly DD-WRT is not an option for me as the 5 GHz support is broken for my router :(
First I had to tell my router that my server should always get the same local IP 192.168.1.200 based on its MAC address.
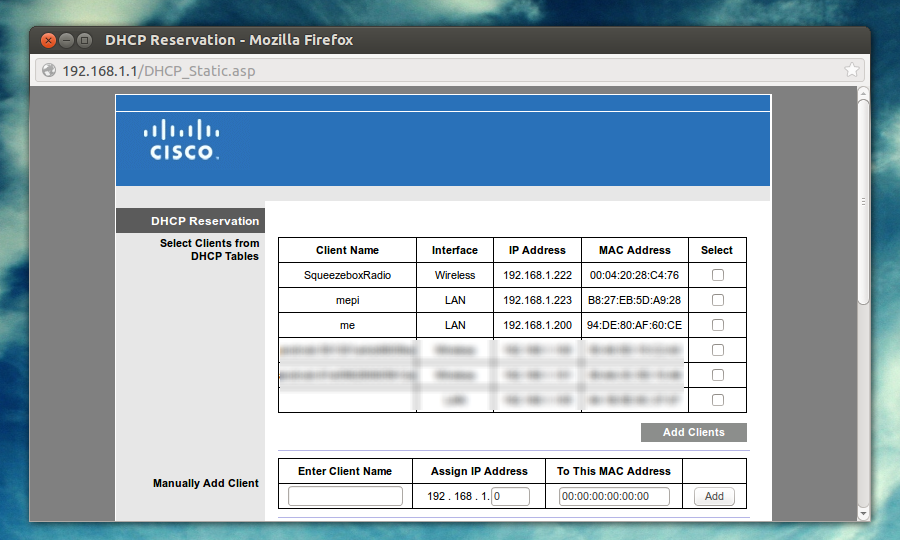
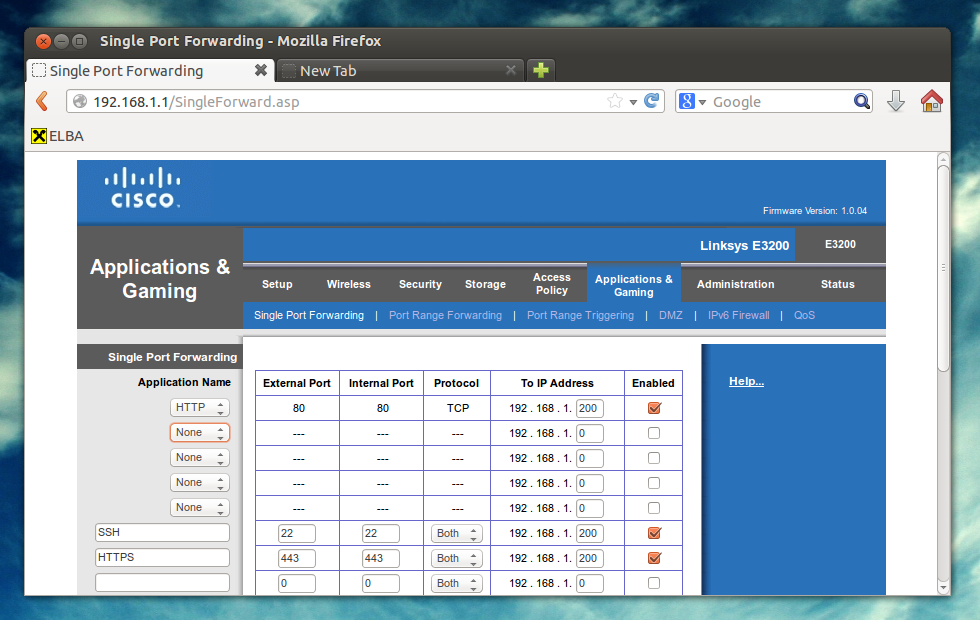
And secondly ports 22, 80 and 443 have to be forwarded to that local IP. Here’s a screenshot what this looks like in my case.
 Now this calls for some champaign! The server is set up and online! You can take a look at some server stats at https://me.chschmid.com.
With the base OS up and running it’s time to install and configure all the services. By the way it is important that the server is not connected to the Internet directly yet. – Working behind a router is ok. You just don’t want that out your server can be accessed via the web already.
SSH is a secure way of accessing your machine from anywhere. You can transfer files, run commands, tunnel services and probably much more using SSH in an easy and encrypted way. After the server installation SSH is running already. But I did some modifications to the config file “/etc/ssh/sshd_config” to make it even more secure. Basically I added one line
AllowUsers christian cs-git
to only allow incoming connections for those two users. Restarting the ssh daemon can be done via
sudo service ssh restart
I don’t want my machine to be accessible via HTTP, but only through the more secure HTTPS. So I configured port 80 to redirect to 443 and enabled https. I also added the following lines to my https config file
SSLProtocol all -SSLv2 -SSLv3
SSLHonorCipherOrder On
SSLCipherSuite
ECDH+AESGCM:DH+AESGCM:ECDH+AES256:DH+AES256:ECDH+AES128:DH+AES:ECDH+3DES:DH+3DES:RSA+AES:RSA+3DES:!ADH:!AECDH:!MD5:!DSS
SSLCompression Off
to make the encryption more robust. – You can check how robust your encryption is via https://sslcheck.globalsign.com.The apache server can be restarted again via
sudo service apache2 restart
… can be installed easily via an opensuse repository at http://software.opensuse.org/download/package?project=isv:ownCloud:community&package=owncloud. The configuration works via the web interface https://localhost/owncloud.
In my case I just transfered the complete database from my old machine to the new server.
The Samba Server is used to share files locally, so that I can download the music files stored on the server from my tablet whenever I am in my local network and stuff. – Again Samba should be installed already and only needs to be configured. I added
[media]
    comment = Media
    path = /home/media
    browsable = yes
    guest ok = yes
    writeable = no
    write list = media
    force group = media
    create mask = 0775
to my “/etc/samba/smb.conf” to share what is in the /home/media folder and allowed following symlinks
follow symlinks = yes
I forgot of course I also created a user media using “sudo adduser media”. I again restarted smbd and nbmd
sudo service smbd restart
sudo service nmbd restart
I use this system to stream my audio across multiple devices (including my Raspberry Pi). To install the server run
sudo add-apt-repository "deb http://debian.slimdevices.com stable main"
sudo apt-get update
sudo apt-get install logitechmediaserver
I also installed and configured the following things
Im glad you made it to the end of this rather boring post, but that is what servers are all about: Running boring stuff in the background that makes our lives easier and more connected.
I did blog about some website’s admins using their privileges to steal login data two days ago. But I guess that is not enough for a week. Today I was informed by Evernote (a service I don’t really use, but gave a trial run at some point) that Adobe (I have to have an Adobe ID to get and read those DRM protected e-books I buy from Thalia) has leaked my data. You’ve heard right: In a world like this company A starts mining on data leaked by company B and in case your e-mail pops up they inform you that company B has leaked data of 150 million users. – Just in case you use the same passwords for both companies, WHICH YOU SHOULD NOT.
So again a kind word of warning
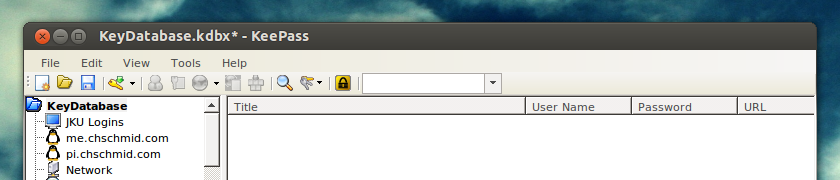
Of course you can either memorize those passwords, or use a safe place to store them such as keepass, which is what I do.
Today I received an e-mail from a website admin, informing me that two of their admins had misconducted. They had stolen the database + all user e-mails and passwords and of course used that information to log into other web services.
Using keepass and different passwords for every website totally makes sense!!! What do you do to protect yourself against something like this?
With all components where they should be and the machine booting, installing an operating system (OS) was the next step. GNU/Linux was the obvious choice and all of my machines run on Ubuntu, so Ubuntu it is.
As the machine is intended to act as server, Ubuntu 12.04LTS would make sense, however as my Xeon Haswell CPU (E3-V1245V3) is relatively new, the Linux Kernel and drivers that come with 12.04 are not a perfect fit for the hardware. – So Ubuntu 13.10 it is.
It was as simple as this: Download the 13.10 server image from http://www.ubuntu.com/, put it on an USB drive using http://www.pendrivelinux.com/ (Windows) or the Startup Disk Creator (Linux). Restart the machine, enter the boot menu by pressing F12 and boot from the USB drive. The setup is quit intuitive. As I started with an empty SSD, all I had to do is select automatic installation using LVM on the empty hard drive. To start with I selected LAMP, OpenSSH and Samba as server roles.
The computer rebooted after the installation leaving me with a login prompt.

After login I installed all the stuff that I would need to also run the PC as desktop.
sudo apt-get update
sudo apt-get dist-upgrade
sudo apt-get install ubuntu-desktop vlc vainfo lm-sensors calibre texlive-full ipe audacity p7zip thunderbird eclipse wine git-core keepass2 gparted filezilla inkscape chromium-browser kile qjackctl virtualbox virtualbox-guest-additions-iso pavucontrol pulseaudio-module-jack joe rosegarden xdotool musescore dconf-tools openjdk-7-jdk libva-intel-vaapi-driver ufw gufw nautilus-open-terminal smartmontools gksu gimp build-essential devscripts debhelper javahelper
Finally reboot the machine and you should be greeted by a graphical user interface.
sudo shutdown -r now
The hardware arrived! Two hours of applied screwdriver science led to this before and after photo.
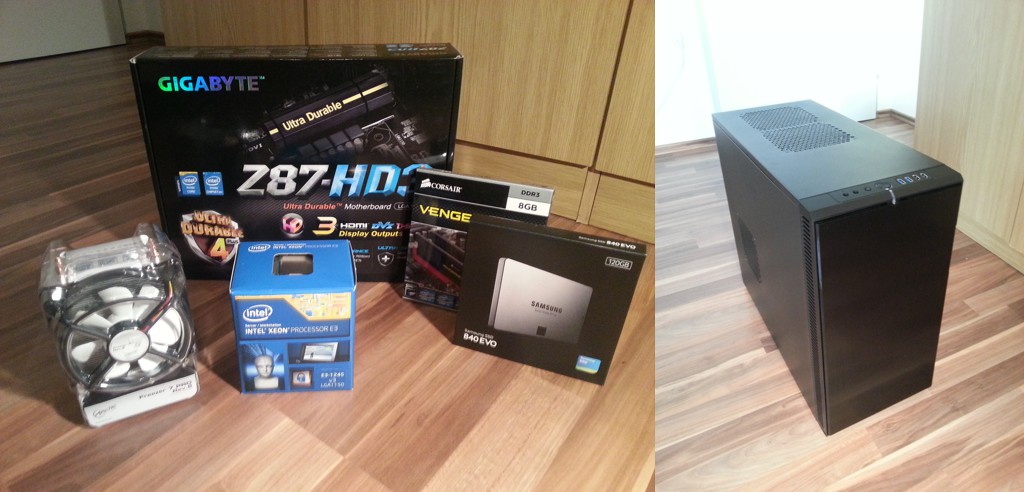
What was new to me, because I had never done it before, was to mount a CPU into a motherboard socket. I guess I’ve done it right because the machine boots as it should.
Next stop: An operating system.